

Gluten-free food, and baked goods in particular, may have come a long, long way, but we’ve all had encounters with not-so-scrumptious creations.
Don’t let the memory of dense, gluey slices or desert-dry cakes that fall apart at the slightest touch of a fork deter you, though. GF treats can be just as indulgent and tasty as their glutinous counterparts.

Yes, believe it or not, this is a gluten-free chocolate cake. Hardie Grant
Just ask Melanie Persson, aka The Very Hungry Coeliac, who is back with her third cookbook Gluten Free Bakes.
Perrson has skin in the GF game – she was diagnosed with Coeliac disease in 2016, and committed herself to recreating the baked goods she once loved so she could continue to enjoy them.
The Melbourne local became the first gluten-free cook on MasterChef Australia, and released the books The Very Hungry Coeliac and Gluten-Free Feasts.
Gluten Free Bakes offers a range with sweet and savoury recipes, including some real show-stoppers – from lemon meringue cake to caramel éclairs and pasteis de nata. Here are three to get you started.
Cannoli
Persson notes you’ll need cannoli tubes; you can find them in cookware shops or online. Recipe makes 12.
Ingredientsneutral oil, for deep-frying100 g (3½ oz) pistachios, finely chopped
Dough
90 g (3 oz) Basic plain flour blend (page 12), plus more for dusting¾ teaspoon psyllium husk powder1 teaspoon xanthan gum1 tablespoon caster sugarpinch of ground cinnamon⅛ teaspoon salt15 g (½ oz) unsalted butter½ teaspoon red-wine vinegar60 g (2 oz) boiling water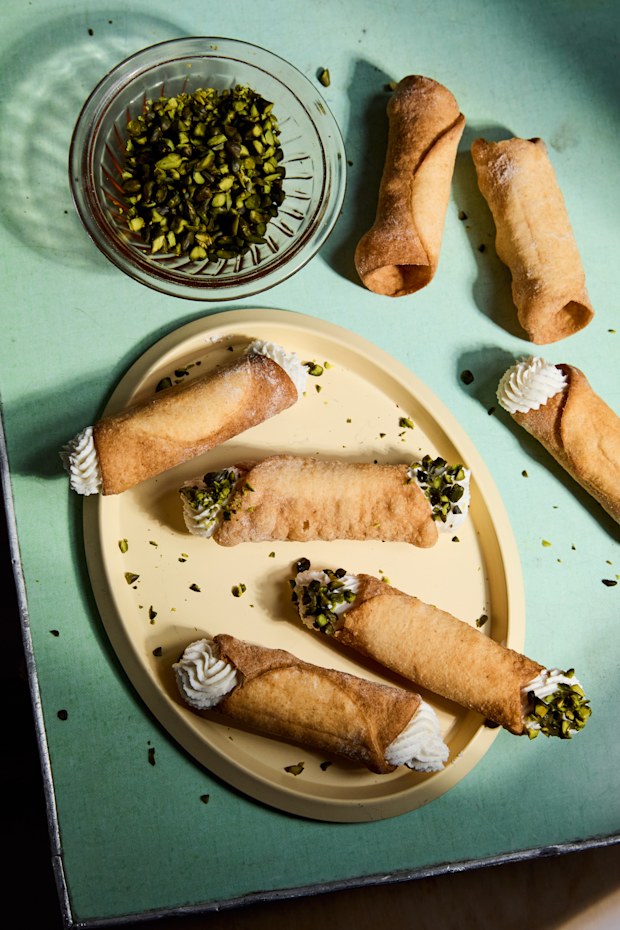
Close your eyes and you’re in Italy. Hardie Grant
Filling
500 g (1 lb 2 oz) mascarpone160 g (5½ oz) ricotta80 g (2¾ oz) icing (confectioners’) sugar2 teaspoons vanilla bean paste or extractMethod
Place all the dough ingredients except the boiling water in a food processor and blitz to combine. Add the boiling water and blitz again until it forms a sticky dough that cleans the side of the processor. Wrap the dough in plastic wrap and allow it to rest for 5 minutes.
On a lightly floured surface, roll the dough out to 1 mm thick. Move it around and dust with flour as necessary to prevent it from sticking. Use a 9–10 cm (3½–4 in) cookie cutter to cut out circles of dough, then use the rolling pin to roll each one out into an oval shape, reducing the thickness to 0.5 mm.
Wrap each dough oval around a cannoli tube, dabbing a little water on the dough to seal the ends – apply some pressure to the join to thin out the dough in that spot as well. Set the prepped tubes aside for 10 minutes to dry out a little (this prevents the cannoli shells from springing apart at the join during cooking).
Meanwhile, heat the oil in a large heavy-based saucepan over medium–high heat until it reaches 200–210°C (390–410°F). Prepare a wire rack on the side so that you can drain away any excess oil from the cannoli after cooking.
Working in small batches of two or three cannoli at a time, carefully lower them into the oil. Agitate them constantly but gently so that they brown evenly without breaking. Cook for 2–3 minutes, until they’re slightly puffy and golden brown all over, then transfer each one to the wire rack.
Once cool to the touch, gently remove the cannoli shells from the tubes. They should just slide off, but if they stick, a gentle twisting motion should release the shells. Be careful as they are fragile. Set the shells aside to cool completely.
Put the finely chopped pistachios in a small bowl, then set aside.
When you’re ready to fill the cannoli, prepare the filling.
Whisk the mascarpone, ricotta, icing sugar and vanilla together in a large bowl until just combined. Transfer the filling to a piping (icing) bag fitted with an open star or French tip.
Pipe the filling into each shell. You might find it easiest to pipe from either end of the shell. Be generous. Dunk each end of the cannoli into the pistachios so that the creamy filling gets coated by the nuts.
The cannoli can be served immediately or refrigerated. Once filled, the shells will stay crisp for 5–6 hours. Unfilled shells will stay crisp for 2–3 days.
Bruce’s chocolate cake
One for the Matilda fans! Persson says this cake is named for the chocolate creation Bruce Bogtrotter memorably eats in the book, and inspired by Leeds bakery Get Baked’s 24-layer cake.
Serves 8-10.

This is one for the gluten-free chocoholic in your life. Hardie Grant
Ingredients130 g (4½ oz) Dutch (unsweetened) cocoa powder360 g (12½ oz) boiling water460 g (1 lb) caster sugar5 eggs2 teaspoons vanilla bean paste or extract1 tablespoon apple-cider vinegar200 ml (7 fl oz) vegetable oil160 g (5½ oz) Basic plain flour blend (page 12)100 g (3½ oz) superfine rice flour4 teaspoons baking powder¾ teaspoon salt
Ganache
900 g (2 lb) milk cooking chocolate, finely chopped450 ml (15 fl oz) thick (double/heavy) cream
Notes
If you are worried about cutting the cakes into nice, even layers, you can make fewer layers.
When stacking the cake layers, use a layer from the bottom of one of the two cakes, turned upside down, as the top layer. This makes for a flat, even finish. It’s also a good idea to dollop a small spoonful of ganache in the centre of your serving plate. This will help to hold the first layer of cake in place.
Method
Preheat the oven to 160°C (320°F) and grease and line two 20 cm (8 in) round cake tins with baking paper.
Whisk the cocoa and boiling water together in a bowl with a pouring lip, then set aside.
Use an electric hand mixer to beat the sugar, eggs, vanilla, vinegar and oil in a large bowl until pale and fluffy. Sift the remaining ingredients onto the batter and beat gently until combined. Fold the cocoa mixture gently through the batter with a spatula until smooth.
Divide the batter evenly between the two cake tins. Bake for 44–46 minutes, or until a skewer inserted into the cakes comes out clean. Allow the cakes to cool in the tins for 10 minutes before turning them out onto a rack to cool completely.
While the cakes cool, make the ganache. Place the chocolate and cream in a large, microwave-safe bowl, then microwave for 1 minute. Stir, then microwave for a further 30 seconds. The chocolate should now be able to be whisked into the cream completely to form a smooth, glossy ganache.
Set aside to cool for about 1 hour – the ganache should pour slowly off a spoon and hold its shape a little, but not be completely cool.
When the ganache is ready, use a cake leveller or a long serrated knife to make two horizontal slices through each cake, dividing each cake into three even layers (see Notes).
Place the first layer of cake on your serving plate, then dollop three or four spoonfuls of ganache on top and smooth it out with an offset spatula to form a 5 mm (¼ in) layer. Repeat, placing the next layer of cake on top and add more ganache. Repeat until all the cake layers are stacked, then spread the remaining ganache on the top and side of the cake. Once fully covered, the cake is ready to serve!
Leftovers can be stored in an airtight container in the fridge for 3–5 days.
Spiced tomato and egg pide
And now for something savoury. Having never seen a gluten-free version of a pide – aka Turkish pizzas – Persson set to work to create one, resulting in this “utterly delicious” dish.
Serves 2.
Ingredients1 egg yolk and 2 tablespoons milk, whisked together for egg washsesame seeds and nigella seeds, to decorate2 eggs (optional)feta, to serve (optional)finely chopped flat-leaf parsley or coriander leaves, to serve (optional)sea salt and freshly cracked black pepper, to serve
And for the savoury baked goods fans… a spiced tomato and egg pide. Hardie Grant
Pide dough
150 g (5½ oz) warm water1½ teaspoons instant dried yeast1 teaspoon caster sugar170 g (6 oz) Basic plain flour blend (see below)½ teaspoon xanthan gum½ teaspoon baking powder½ teaspoon salt10 g (¼ oz) honey½ teaspoon apple-cider vinegar20 g (¾ oz) unsalted butter, coldvegetable oil, for greasing
Filling
½ brown onion, sliced½ red capsicum (bell pepper), seeded, sliced2 garlic cloves, minced1 tablespoon olive oil1 teaspoon tomato paste (concentrated puree)1 teaspoon ground cumin¼ teaspoon ground coriander¼ teaspoon ground paprika¼ teaspoon dried oregano1 large tomato, diced¼ teaspoon salt50 g (1¾ oz) tomato passata (pureed tomatoes)cracked black pepper, to taste
To make the pide dough, add the warm water to a cup with a pouring lip, then mix in the yeast and sugar. Cover and place in a warm, draft-free place for 10 minutes. A thick layer of foam should form on top, indicating the yeast has bloomed. If it hasn’t, your yeast might not be active (see page 117 for guidelines on yeast).
Combine the remaining dry ingredients in the bowl of a stand mixer fitted with a paddle attachment. Add the water–yeast mixture, honey and vinegar, then mix on low speed until mostly combined. Increase the speed to medium–high and beat for 3–4 minutes, scraping down the bowl once or twice to make sure all the dry ingredients have been incorporated.
Add the butter and beat for a further 2–3 minutes on medium–high or until no lumps of butter remain. It should be a wet, sticky dough.
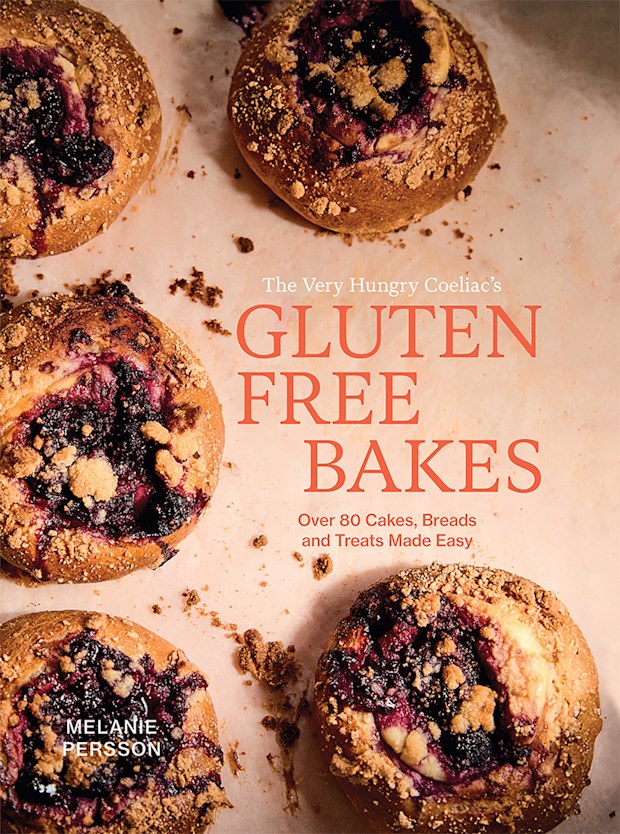
You’ll find more tasty treats in Melanie Persson’s new book Gluten Free Bakes. Supplied
Grease a large bowl with 1–2 teaspoons of oil, then scrape down the side of the stand mixer bowl to gather the dough into a single ball, and transfer it to the greased bowl. Shake the dough around in the bowl a little, turning it over a couple of times. The aim is not to incorporate oil into the dough at this stage, just to smooth it out a little and make it easier to turn out later. Cover the bowl with plastic wrap and a tea (dish) towel, then place in a warm, draft-free place for 1 hour.
Meanwhile, make the filling. Fry the onion, capsicum and garlic in the olive oil in a large frying pan over medium–high heat for 4–5 minutes, until fragrant. Add the tomato paste and spices and cook, stirring intermittently, for 3–4 minutes, before adding the diced tomato, salt and passata. Stir to combine, season with cracked pepper and continue to cook, stirring regularly, for another 8–10 minutes, until the vegetables are very tender and there is just enough tomato sauce to bind the filling together. Season with salt, to taste, then set aside to cool while the dough finishes proving.
Preheat the oven to 210°C (410°F) and place a pizza stone or baking tray in the middle of your oven to preheat as well.
After proving, the dough should have doubled in size. Grease your work surface with a little oil, greasing your hands in the process, and tip out the dough. Work the dough by hand to remove the air bubbles, kneading it for 30–40 seconds before gathering it into a single smooth ball. Divide this into two.
Working on your greased work surface, roll the dough balls out into 16 × 26 cm (6¼ × 10¼ in) ovals, around 5 mm (¼ in) thick. Transfer these to similarly sized sheets of baking paper – this will make moving the filled pides onto the pizza stone or preheated baking tray easier. Leaving a 2–3 cm (¾–1¼ in) border around the edge of the dough, spread half the filling over each of the pides. Fold the long edges of dough over to partially cover the filling, then squeeze and pinch either end of the pide to form a ‘boat’ shape, holding in the filling. Brush the exposed dough with egg wash and sprinkle on the seeds. If desired, crack an egg into the centre of each pide – push the filling around to create a shallow cavity that’ll help to hold the egg in place.
Transfer the assembled pides to the preheated pizza stone or baking tray and cook for 16–18 minutes, or until they are golden brown. Allow them to cool on the tray for at least 10 minutes before serving.
To serve, you can crumble some feta on top, add a sprinkle of herbs and salt and pepper, if desired.
Basic plain flour blend
MAKES 1 KG (2 LB 3¼ OZ)
315 g (11 oz) rice flour250 g (9 oz) tapioca starch250 g (9 oz) gluten-free cornflour (cornstarch)165 g (5¾ oz) potato starch20 g (¾ oz) xanthan gum
MAKES 2 KG (4 LB 6½ OZ)
630 g (22¼ oz) rice flour500 g (17¾ oz) tapioca starch500 g (17¾ oz) gluten-free cornflour (cornstarch)330 g (11¾ oz) potato starch40 g (1½ oz) xanthan gumStore in an airtight container until ready to use.
Gluten Free Bakes is out now.